Today AWS Amplify announces new Admin UI to configure an application backend, and manage app users and content outside the AWS console. This new feature makes it easier to use AWS services and accelerates the development and management of full-stack web and mobile apps.
We launched AWS Amplify in November 2018, and since then it has been helping front-end web and mobile developers to quickly develop and deploy cloud-connected web and mobile applications. In order to stay ahead of the curve and deliver innovation to customers, businesses need to ship features fast. However, developers and non-developers who are unfamiliar with AWS fundamentals require training, which slows the entire process down.
AWS Amplify today launches a new Admin UI that enables team members to interface with AWS without requiring an AWS account (only the first deployment requires an AWS account).
The Admin UI provides simple yet powerful tools to model database tables, add authentication and authorization, and manage app content, users, and groups. It also offers the ability to manage the application users and content. The AWS Amplify Admin UI focuses on data types rather than backend infrastructure. All the backend resources generate infrastructure as code (IaC) templates that can be committed in the team repository and integrated with AWS Amplify continuous deployment workflow to manage the different environments.
Let’s Look at an Example Using the New AWS Amplify Admin UI
Imagine that you are a front-end web developer creating a website for a local restaurant. The restaurant owner wants to have a website where they can show their daily menu, and wants a simple way to update the content of the page every day.
There are many ways to solve this problem. You can spin up a server and install a CMS for the restaurant owner to manage the menu. For this particular use case, having a server exclusively to do this is just over-provisioning resources. Or, you can create the CMS yourself using serverless tools; however, this adds a lot of complexity and extra time to the development cycle.
Another option is to use the new AWS Amplify Admin UI that allows you to take advantage of many AWS managed services to create the backend quickly and also provides the ability to manage the application users and content.
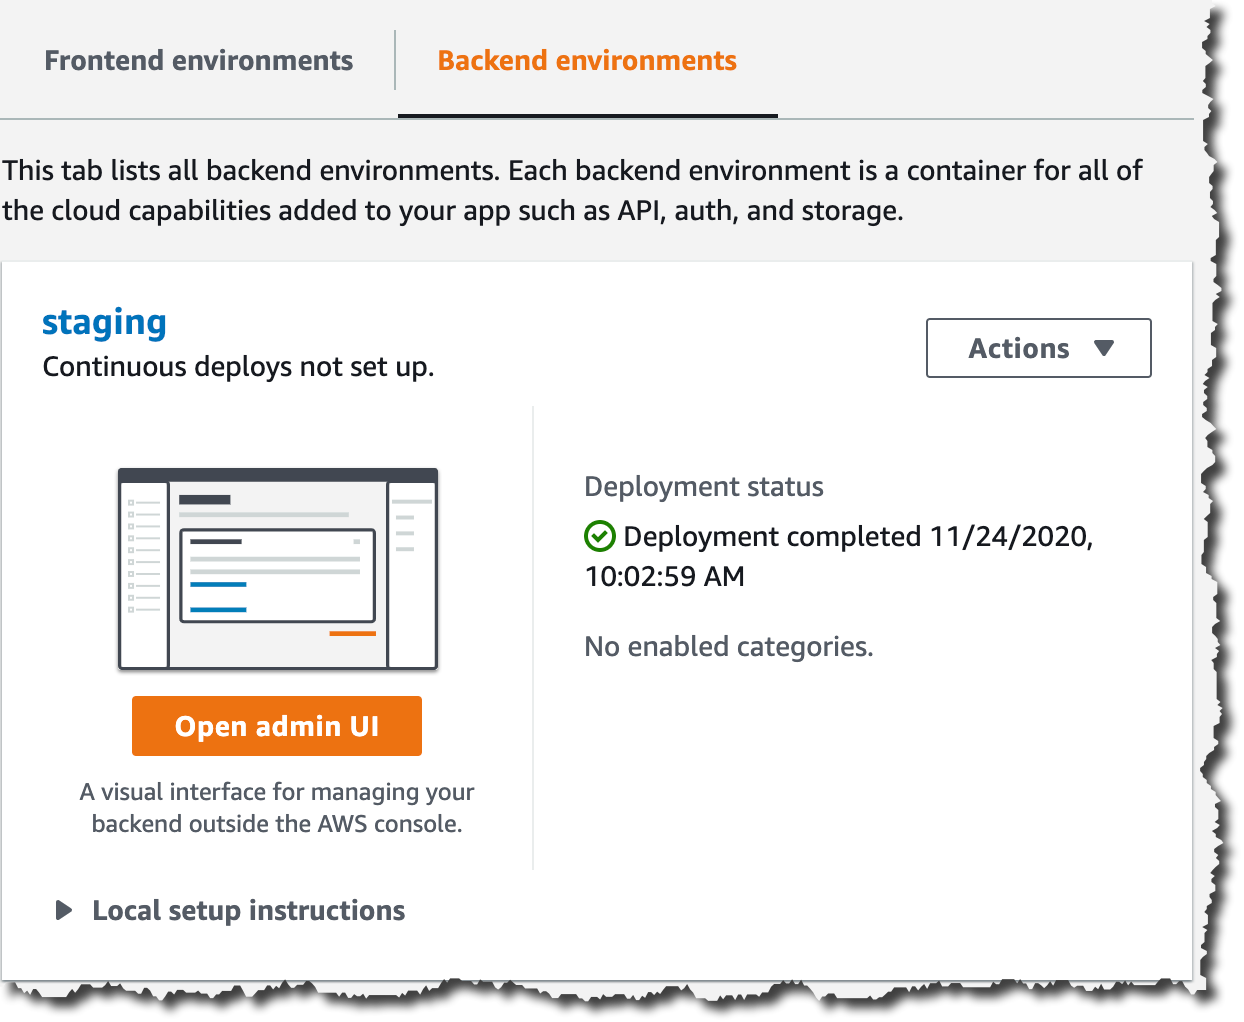
The first thing you need to do is to create a new AWS Amplify app backend in the AWS Console. AWS Amplify will create a backend environment called staging. When, your app backend is ready, open the new Admin UI. If you would like to get another developer working on this application who doesn’t have experience with AWS, nor access to the AWS account, now you can grant access to them so they can continue the work on the UI. But for now, let’s imagine that you are going to do all the development.
The Admin UI contains all the tools that application developers need to configure the application backend and that content managers need to update the application content.
In the sidebar of the Admin UI (as shown in the following illustration), you can find all the different options for setting up your application.
To get started with the restaurant website, you need a menu data model. For that, first go to Data (1), then create a new data model call Menu (2), add the necessary fields and Save and deploy (3) the model. Saving and deploying the model will create all the needed AWS resources in the backend, like an AWS AppSync API and a Amazon DynamoDB table to host the menu items. Deploying takes a few minutes.

After your model is deployed, you can start working on your website. For this example I will be using React, one of the web frameworks supported by AWS Amplify, but you can do the same example with any of the supported frameworks.
First, you need to install the AWS Amplify CLI:
npm install -g @aws-amplify/cliThen create a new React application:
npx create-react-app react-amplified
cd react-amplified
When your application is created, you can configure it with the AWS Amplify application we just created. For that, go back to the Admin UI and select Local setup instructions (1), and execute the amplify command (2) in the directory where the web application is stored in your computer.

When you execute that command, a browser window will open that asks you if you are sure that you want to log in to the AWS Amplify Admin UI. Selecting yes will grant the AWS Amplify CLI access to deploy updates to the backend directly from your local desktop. The CLI will prompt you with a few questions about your local environment, and finally will ask if you plan to modify this backend locally. Choose yes.
When that process ends, you will notice some changes in your web application directory: a couple of new directories were created (amplify and src/models) and also a new file (aws-exports.js). These files and directories hold all the configuration for your AWS Amplify application.
Now it’s time to develop your application. To access the menu data model you created in the first steps, you will use the DataStore library from AWS Amplify. DataStore allows you to connect to your deployed database and perform CRUD, sort and filter operations from your UI to manipulate backend data. In the Admin UI, you can see some examples on how to create, update, delete and query the model.

When the website is ready, it’s time to add some content. The restaurant owner is the one adding the menu items. In order for them to be able to add items, they need to have permissions to access the Admin UI for this application.
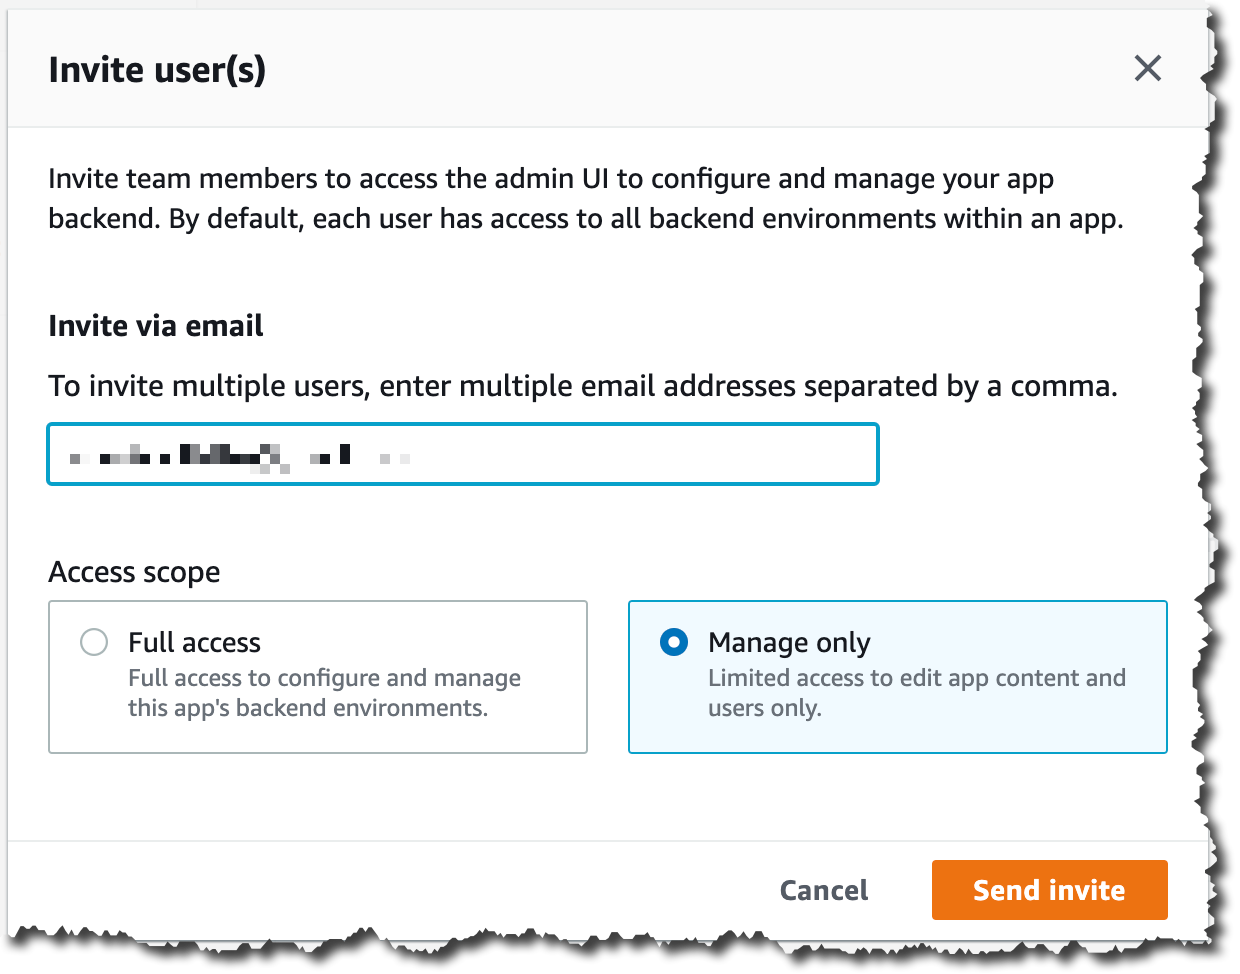
To do this, you need to create a new Admin UI account for the restaurant owner with the correct permissions. Go to the AWS Amplify console for your application and then to the Admin UI management and invite users.
When adding new users to the Admin UI you can define their permission scope. If you want to grant them full access, they will be able to configure and manage the application backend environment, and if you want them just to be able to edit the content, you can give them the manage only access scope. For the restaurant owner grant manage only permissions.
After sending the invite, the restaurant owner will receive an email with a link to access the Admin UI and a username and password to log in. When they log in, they can go to the Content tab (1) and start adding items in their menu (2) and they can see the items available in the table in the screen (3).

From this screen, the restaurant owner can add, delete and edit items in their menu whenever they want to. These changes are reflected in the website immediately after they save.
The use cases for Admin UI are endless, such as blogs, e-commerce sites, planning apps, etc. Developers can build complex and feature-rich apps by focusing on their domain-specific data model instead of spending hours deploying and stitching together cloud infrastructure. AWS Amplify gives front-end developers the fastest and easiest way to develop mobile and web apps. And all accessible to developers that are not familiar with the cloud and without the need to give AWS access to everybody in the team.
Availability
AWS Amplify Admin UI is available at launch in: US East (N. Virginia), US East (Ohio), US West (Oregon), Asia Pacific (Mumbai), Asia Pacific (Seoul), Asia Pacific (Singapore), Asia Pacific (Sydney), Asia Pacific (Tokyo), Canada (Central), Europe (Frankfurt), Europe (Ireland), and Europe (London).
For more information, visit the Amplify service page. Get started building a data model without an AWS account in the sandbox experience.
— Marcia
Via AWS News Blog https://ift.tt/1EusYcK
No comments:
Post a Comment