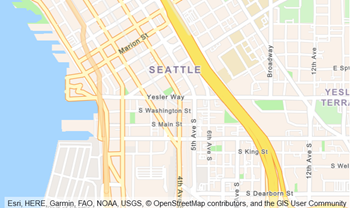
 We want to make it easier and more cost-effective for you to add maps, location awareness, and other location-based features to your web and mobile applications. Until now, doing this has been somewhat complex and expensive, and also tied you to the business and programming models of a single provider.
Introducing Amazon Location Service
Today we are making Amazon Location available in preview form and you can start using it today. Priced at a fraction of common alternatives, Amazon Location Service gives you access to maps and location-based services from multiple providers on an economical, pay-as-you-go basis.
You can use Amazon Location Service to build applications that know where they are and respond accordingly. You can display maps, validate addresses, perform geocoding (turn an address into a location), track the movement of packages and devices, and much more. You can easily set up geofences and receive notifications when tracked items enter or leave a geofenced area. You can even overlay your own data on the map while retaining full control.
You can access Amazon Location Service from the AWS Management Console, AWS Command Line Interface (CLI), or via a set of APIs. You can also use existing map libraries such as Mapbox GL and Tangram.
All About Amazon Location
Let’s take a look at the types of resources that Amazon Location Service makes available to you, and then talk about how you can use them in your applications.
Maps – Amazon Location Service lets you create maps that make use of data from our partners. You can choose between maps and map styles provided by Esri and by HERE Technologies, with the potential for more maps & more styles from these and other partners in the future. After you create a map, you can retrieve a tile (at one of up to 16 zoom levels) using the GetMapTile function. You won’t do this directly, but will use Mapbox GL, Tangram, or another library instead.
Place Indexes – You can choose between indexes provided by Esri and HERE. The indexes support the SearchPlaceIndexForPosition function which returns places, such as residential addresses or points of interest (often known as POI) that are closest to the position that you supply, while also performing reverse geocoding to turn the position (a pair of coordinates) into a legible address. Indexes also support the SearchPlaceIndexForText function, which searches for addresses, businesses, and points of interest using free-form text such as an address, a name, a city, or a region.
Trackers –Trackers receive location updates from one or more devices via the BatchUpdateDevicePosition function, and can be queried for the current position (GetDevicePosition) or location history (GetDevicePositionHistory) of a device. Trackers can also be linked to Geofence Collections to implement monitoring of devices as they move in and out of geofences.
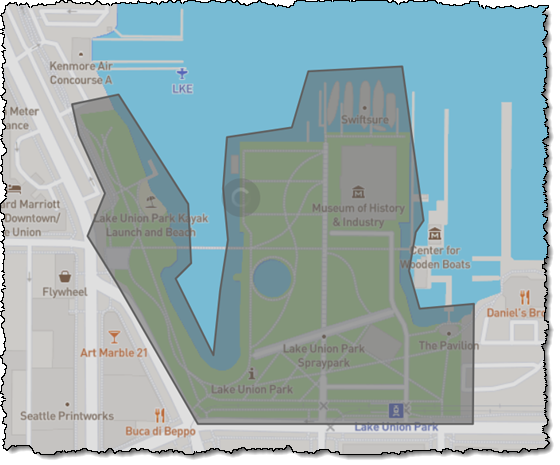
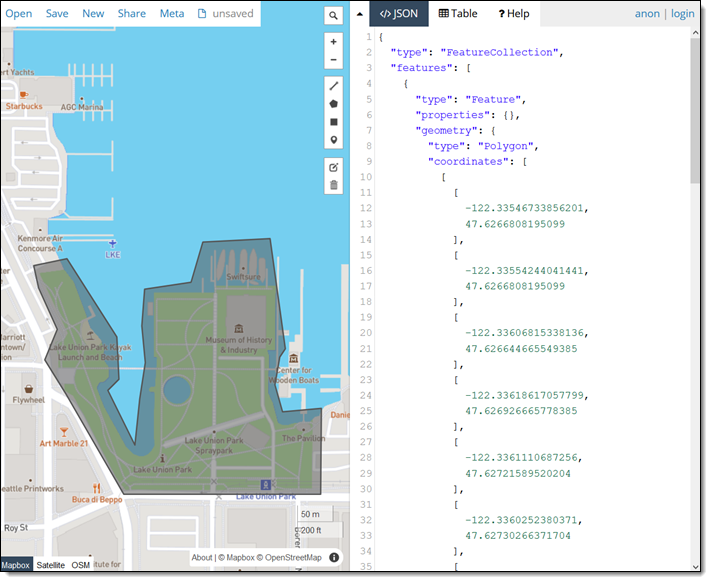
Geofence Collections – Each collection contains a list of geofences that define geographic boundaries. Here’s a geofence (created with geojson.io) that outlines a park near me:
Amazon Location in Action
I can use the AWS Management Console to get started with Amazon Location and then move on to the AWS Command Line Interface (CLI) or the APIs if necessary. I open the Amazon Location Service Console, and I can either click Try it! to create a set of starter resources, or I can open up the navigation on the left and create them one-by-one. I’ll go for one-by-one, and click Maps:
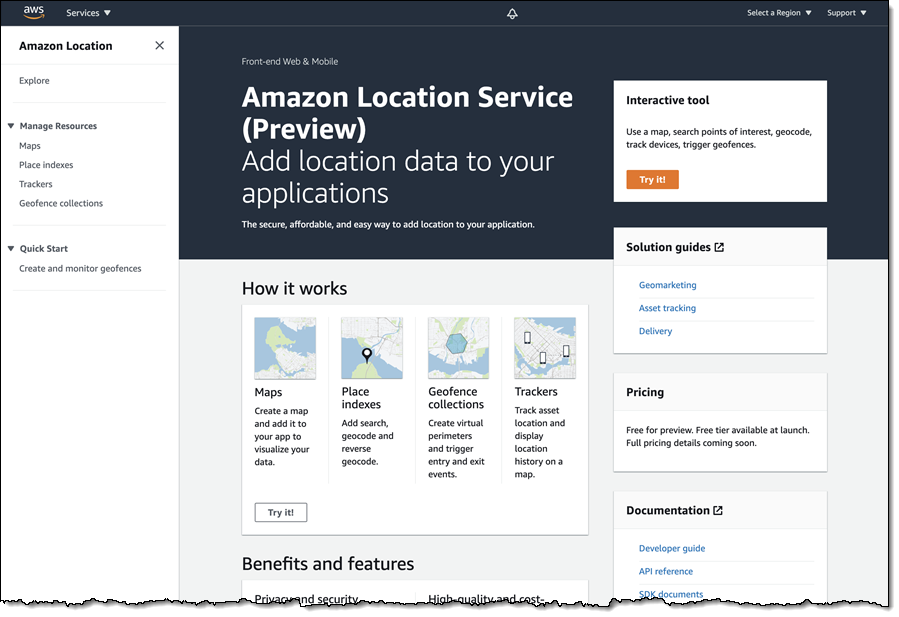
Then I click Create map to proceed:
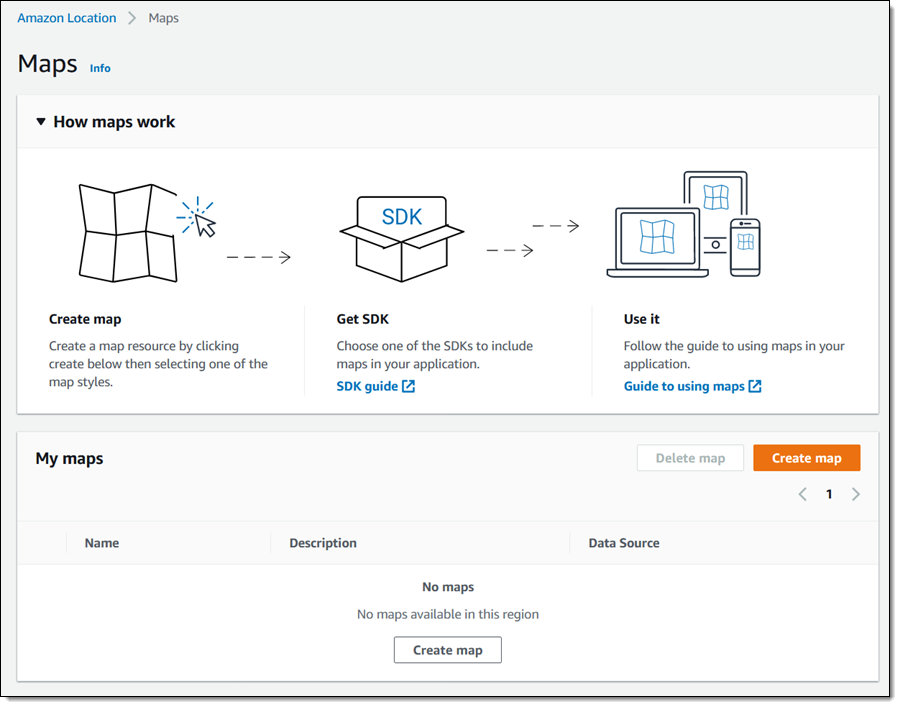
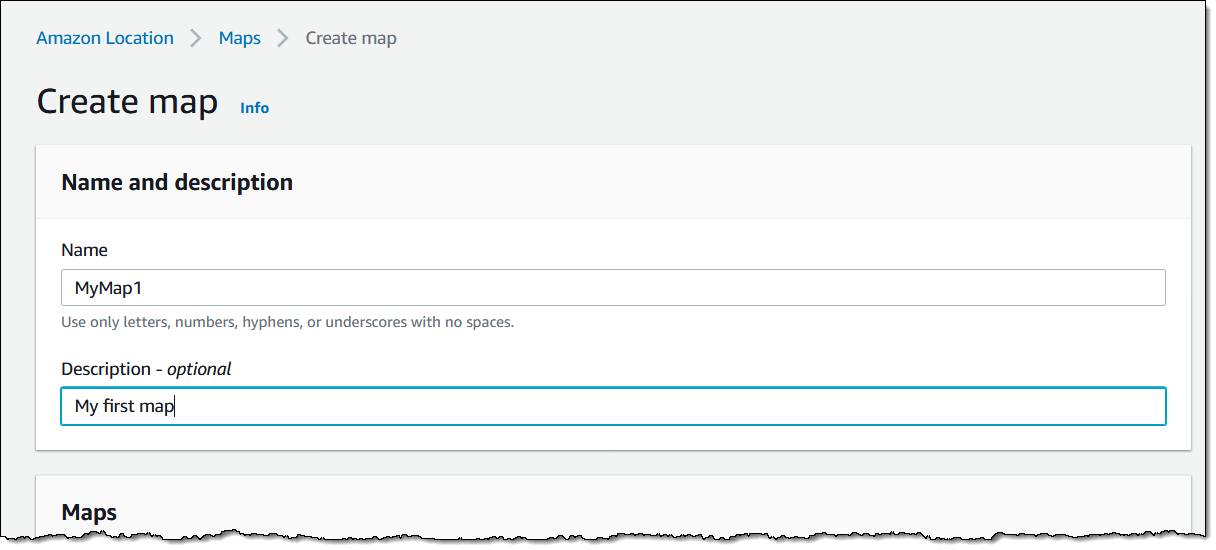
I enter a Name and a Description:
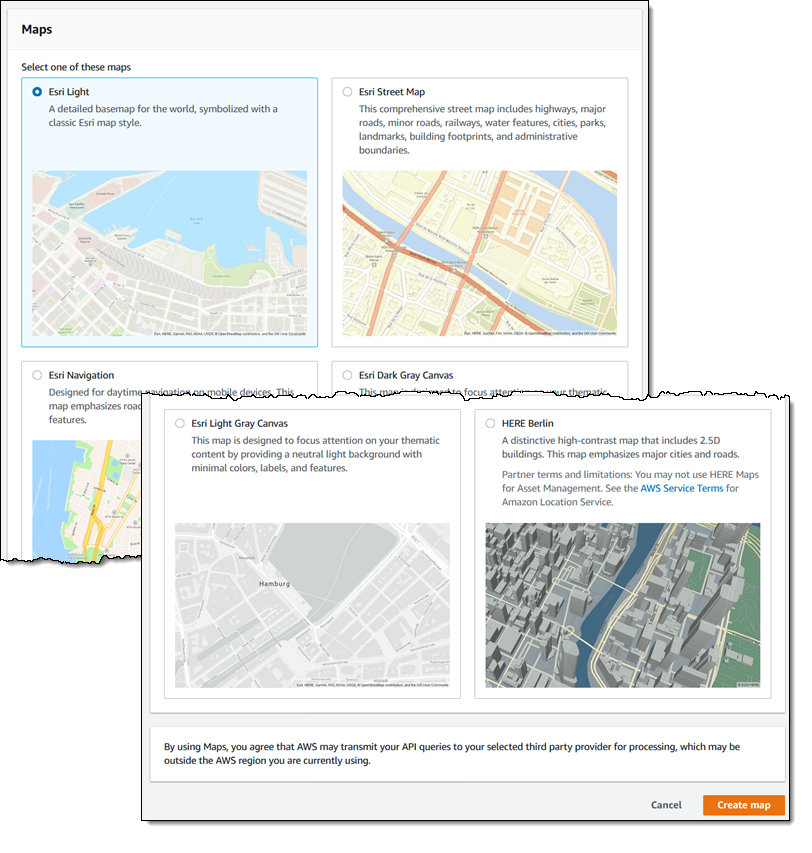
Then I choose the desired map and click Create map:
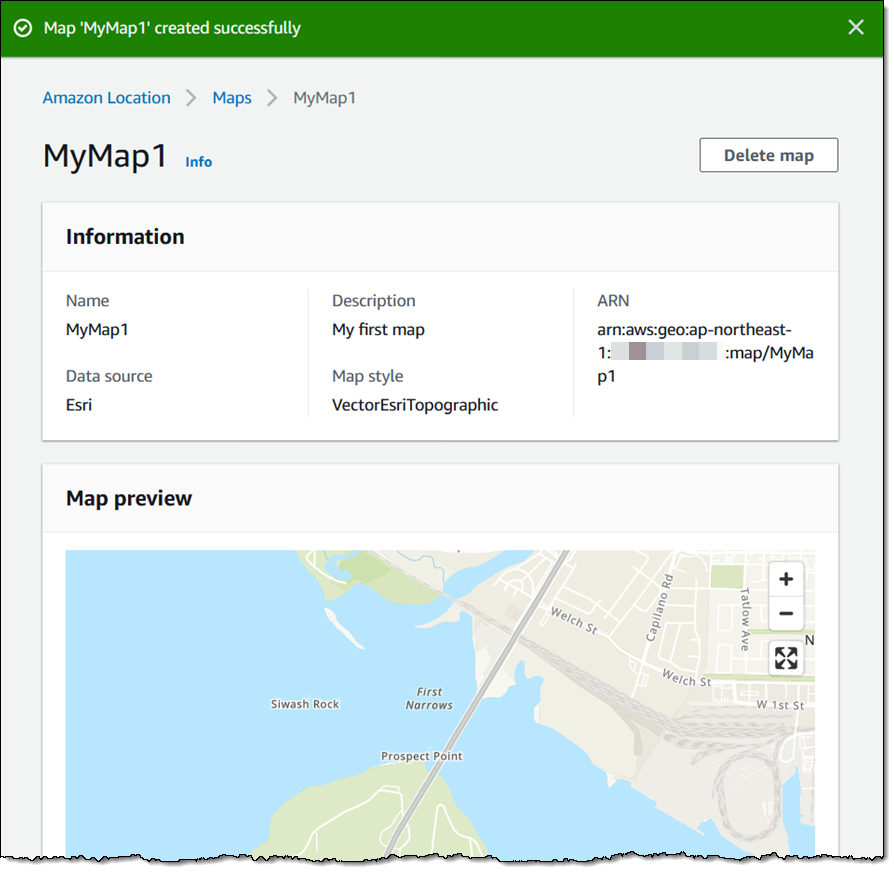
The map is created and ready to be added to my application right away:
Now I am ready to embed the map in my application, and I have several options including the Amplify JavaScript SDK, the Amplify Android SDK, the Amplify iOS SDK, Tangram, and Mapbox GL (read the Developer Guide to learn more about each option).
Next, I want to track the position of devices so that I can be notified when they enter or exit a given region. I use a GeoJSON editing tool such as geojson.io to create a geofence that is built from polygons, and save (download) the resulting file:
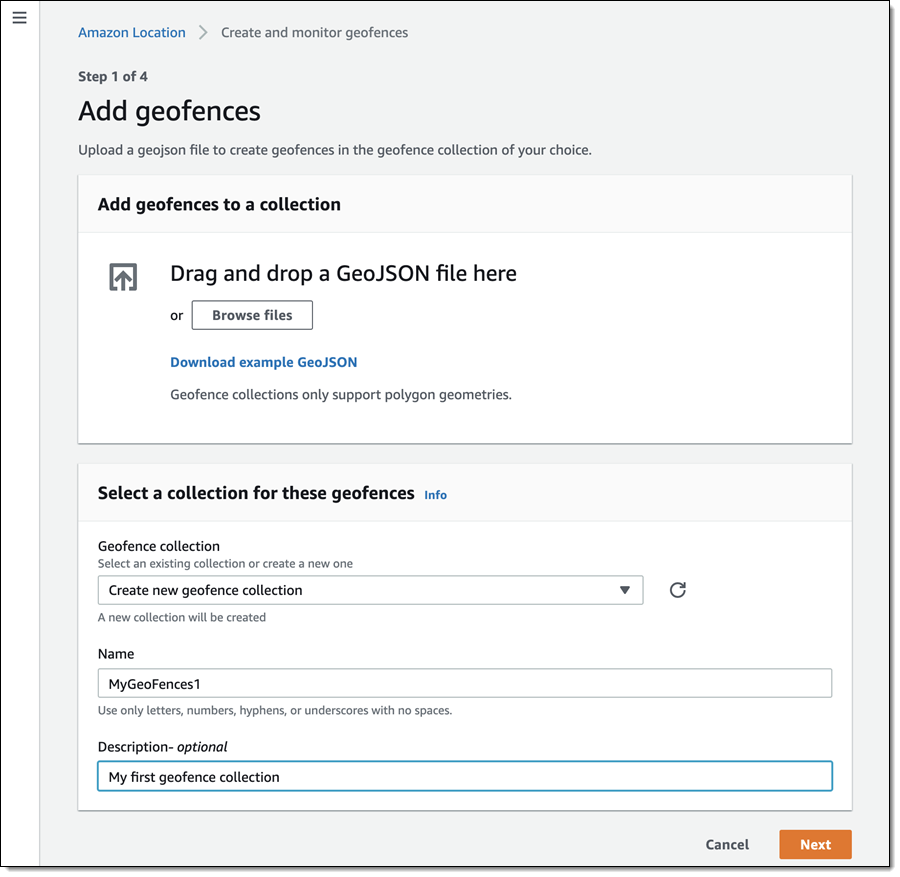
I click Create geofence collection in the left-side navigation, and in Step 1, I add my GeoJSON file, enter a Name and Description, and click Next:
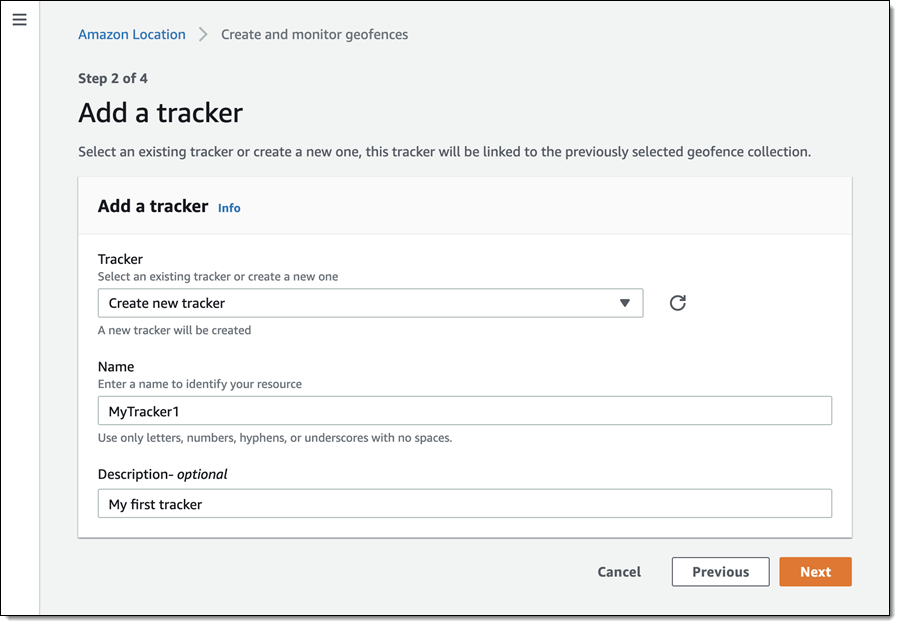
Now I enter a Name and a Description for my tracker, and click Next. It will be linked to the geofence collection that I just created:
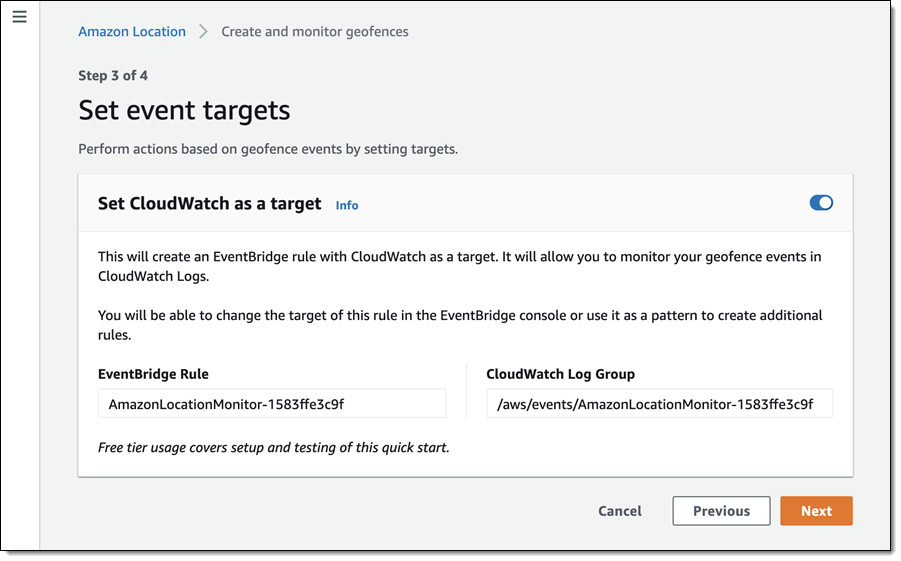
The next step is to arrange for the tracker to send events to Amazon EventBridge so that I can monitor them in CloudWatch Logs. I leave the settings as-is, and click Next to proceed:
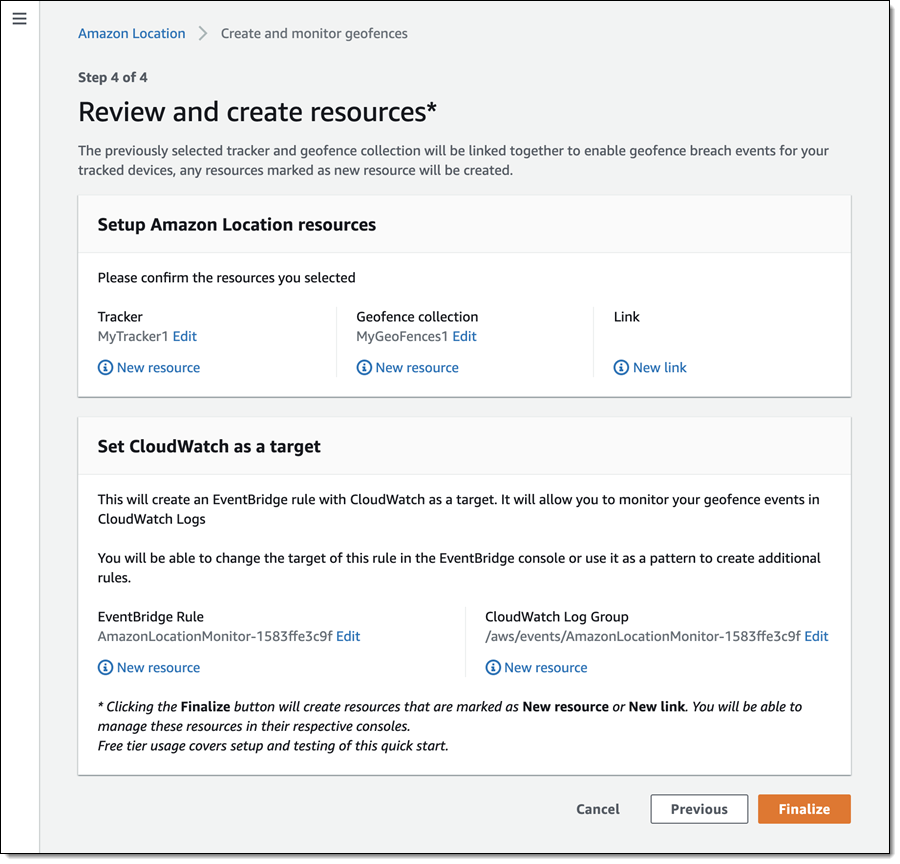
I review all of my choices, and click Finalize to move ahead:
The resources are created, set up, and ready to go:
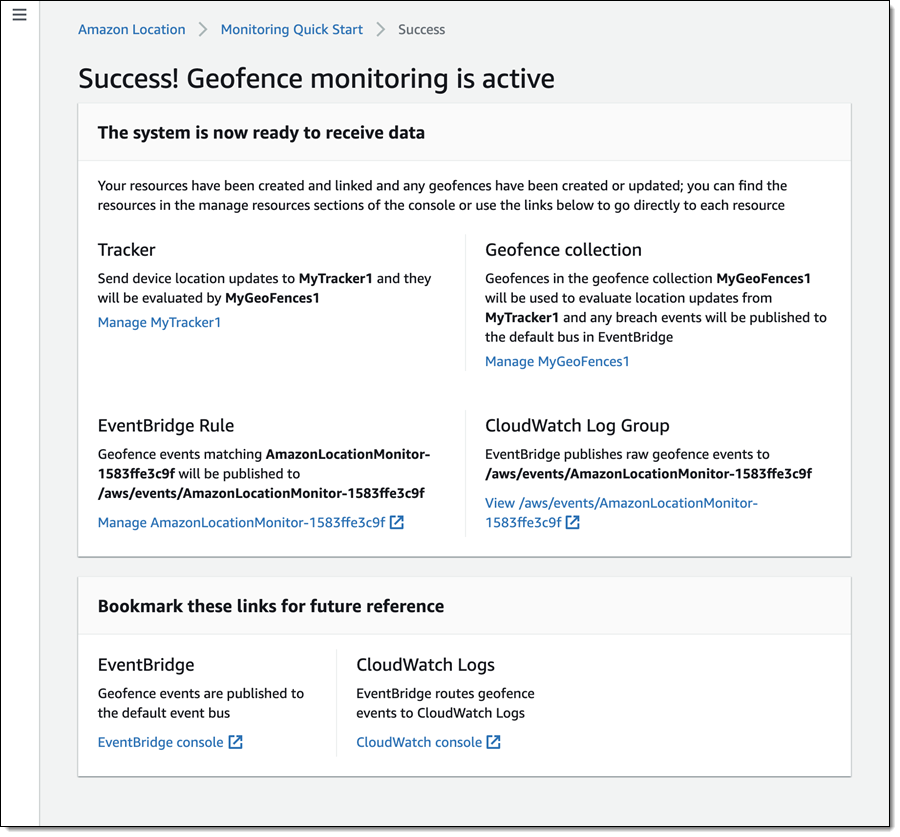
I can then write code or use the CLI to update the positions of my devices:
$ aws location batch-update-device-position \
   --tracker-name MyTracker1 \
   --updates "DeviceId=Jeff1,Position=-122.33805,47.62748,SampleTime=2020-11-05T02:59:07+0000"
After I do this a time or two, I can retrieve the position history for the device:
$ aws location get-device-position-history \
  -tracker-name MyTracker1 --device-id Jeff1
------------------------------------------------
|           GetDevicePositionHistory           |
+----------------------------------------------+
||               DevicePositions              ||
|+---------------+----------------------------+|
||  DeviceId     |  Jeff1                     ||
||  ReceivedTime |  2020-11-05T02:59:17.246Z  ||
||  SampleTime   |  2020-11-05T02:59:07Z      ||
|+---------------+----------------------------+|
|||                 Position                 |||
||+------------------------------------------+||
|||  -122.33805                              |||
|||  47.62748                                |||
||+------------------------------------------+||
||               DevicePositions              ||
|+---------------+----------------------------+|
||  DeviceId     |  Jeff1                     ||
||  ReceivedTime |  2020-11-05T03:02:08.002Z  ||
||  SampleTime   |  2020-11-05T03:01:29Z      ||
|+---------------+----------------------------+|
|||                 Position                 |||
||+------------------------------------------+||
|||  -122.43805                              |||
|||  47.52748                                |||
||+------------------------------------------+||
I can write Amazon EventBridge rules that watch for the events, and use them to perform any desired processing. Events are published when a device enters or leaves a geofenced area, and look like this:
{
  "version": "0",
  "id": "7cb6afa8-cbf0-e1d9-e585-fd5169025ee0",
  "detail-type": "Location Geofence Event",
  "source": "aws.geo",
  "account": "123456789012",
  "time": "2020-11-05T02:59:17.246Z",
  "region": "us-east-1",
  "resources": [
    "arn:aws:geo:us-east-1:123456789012:geofence-collection/MyGeoFences1",
    "arn:aws:geo:us-east-1:123456789012:tracker/MyTracker1"
  ],
  "detail": {
        "EventType": "ENTER",
        "GeofenceId": "LakeUnionPark",
        "DeviceId": "Jeff1",
        "SampleTime": "2020-11-05T02:59:07Z",
        "Position": [-122.33805, 47.52748]
  }
}
Finally, I can create and use place indexes so that I can work with geographical objects. I’ll use the CLI for a change of pace. I create the index:
$ aws location create-place-index \
  --index-name MyIndex1 --data-source Here
Then I query it to find the addresses and points of interest near the location:
$ aws location search-place-index-for-position --index-name MyIndex1 \
  --position "[-122.33805,47.62748]" --output json \
  |  jq .Results[].Place.Label
"Terry Ave N, Seattle, WA 98109, United States"
"900 Westlake Ave N, Seattle, WA 98109-3523, United States"
"851 Terry Ave N, Seattle, WA 98109-4348, United States"
"860 Terry Ave N, Seattle, WA 98109-4330, United States"
"Seattle Fireboat Duwamish, 860 Terry Ave N, Seattle, WA 98109-4330, United States"
"824 Terry Ave N, Seattle, WA 98109-4330, United States"
"9th Ave N, Seattle, WA 98109, United States"
...
I can also do a text-based search:
$ aws location search-place-index-for-text --index-name MyIndex1 \
  --text Coffee --bias-position "[-122.33805,47.62748]" \
  --output json | jq .Results[].Place.Label
"Mohai Cafe, 860 Terry Ave N, Seattle, WA 98109, United States"
"Starbucks, 1200 Westlake Ave N, Seattle, WA 98109, United States"
"Metropolitan Deli and Cafe, 903 Dexter Ave N, Seattle, WA 98109, United States"
"Top Pot Doughnuts, 590 Terry Ave N, Seattle, WA 98109, United States"
"Caffe Umbria, 1201 Westlake Ave N, Seattle, WA 98109, United States"
"Starbucks, 515 Westlake Ave N, Seattle, WA 98109, United States"
"Cafe 815 Mercer, 815 9th Ave N, Seattle, WA 98109, United States"
"Victrola Coffee Roasters, 500 Boren Ave N, Seattle, WA 98109, United States"
"Specialty's, 520 Terry Ave N, Seattle, WA 98109, United States"
...
Both of the searches have other options; read the Geocoding, Reverse Geocoding, and Search to learn more.
Things to Know
Amazon Location is launching today as a preview, and you can get started with it right away. During the preview we plan to add an API for routing, and will also do our best to respond to customer feedback and feature requests as they arrive.
Pricing is based on usage, with an initial evaluation period that lasts for three months and lets you make numerous calls to the Amazon Location APIs at no charge. After the evaluation period you pay the prices listed on the Amazon Location Pricing page.
Amazon Location is available in the US East (N. Virginia), US East (Ohio), US West (Oregon), Europe (Ireland), and Asia Pacific (Tokyo) Regions.
— Jeff;
Via AWS News Blog https://ift.tt/1EusYcK
 We want to make it easier and more cost-effective for you to add maps, location awareness, and other location-based features to your web and mobile applications. Until now, doing this has been somewhat complex and expensive, and also tied you to the business and programming models of a single provider.


 Embedded developers at original equipment manufacturers (OEMs) and MCU vendors using FreeRTOS to build long-lived applications on IoT devices now get the predictability and feature stability of an LTS release without compromising access to critical security updates. The FreeRTOS 202012.00 LTS release applies to the FreeRTOS kernel, connectivity libraries (FreeRTOS+TCP, coreMQTT, coreHTTP), security library (PKCS #11 implementation), and AWS library (


