Enterprises adopting the AWS Cloud want to effectively manage identities. Having one central place to manage identities makes it easier to enforce policies, to manage access permissions, and to reduce the overhead by removing the need to duplicate users and user permissions across multiple identity silos. Having a unique identity also simplifies access for all of us, the users. We all have access to multiple systems, and we all have troubles to remember multiple distinct passwords. Being able to connect to multiple systems using one single combination of user name and password is a daily security and productivity gain. Being able to link an identity from one system with an identity managed on another trusted system is known as “Identity Federation“, which single sign-on is a subset of. Identity Federation is made possible thanks to industry standards such as Security Assertion Markup Language (SAML), OAuth, OpenID and others.
Recently, we announced a new evolution of AWS Single Sign-On, allowing you to link AWS identities with Azure Active Directory identities. We did not stop there. Today, we are announcing the integration of AWS Single Sign-On with Okta Universal Directory.
Let me show you the experience for System Administrators, then I will demonstrate the single sign-on experience for the users.
First, let’s imagine that I am an administrator for an enterprise that already uses Okta Universal Directory to manage my workforce identities. Now I want to enable a simple and easy to use access to our AWS environments for my users, using their existing identities. As most enterprises, I manage multiple AWS Accounts. I want more than just a single sign-on solution, I want to manage access to my AWS Accounts centrally. I do not want to duplicate my Okta groups and user memberships by hand, nor maintain multiple identity systems (Okta Universal Directory and one for each AWS Account I manage). I want to enable automatic user synchronization between Okta and AWS. My users will sign in to the AWS environments using the experience they are already familiar with in Okta.
Connecting Okta as an identity source for AWS Single Sign-On
The first step is to add AWS Single Sign-On as an “application” Okta users can connect to. I navigate to the Okta administration console and login with my Okta administrator credentials, then I navigate to the Applications tab.
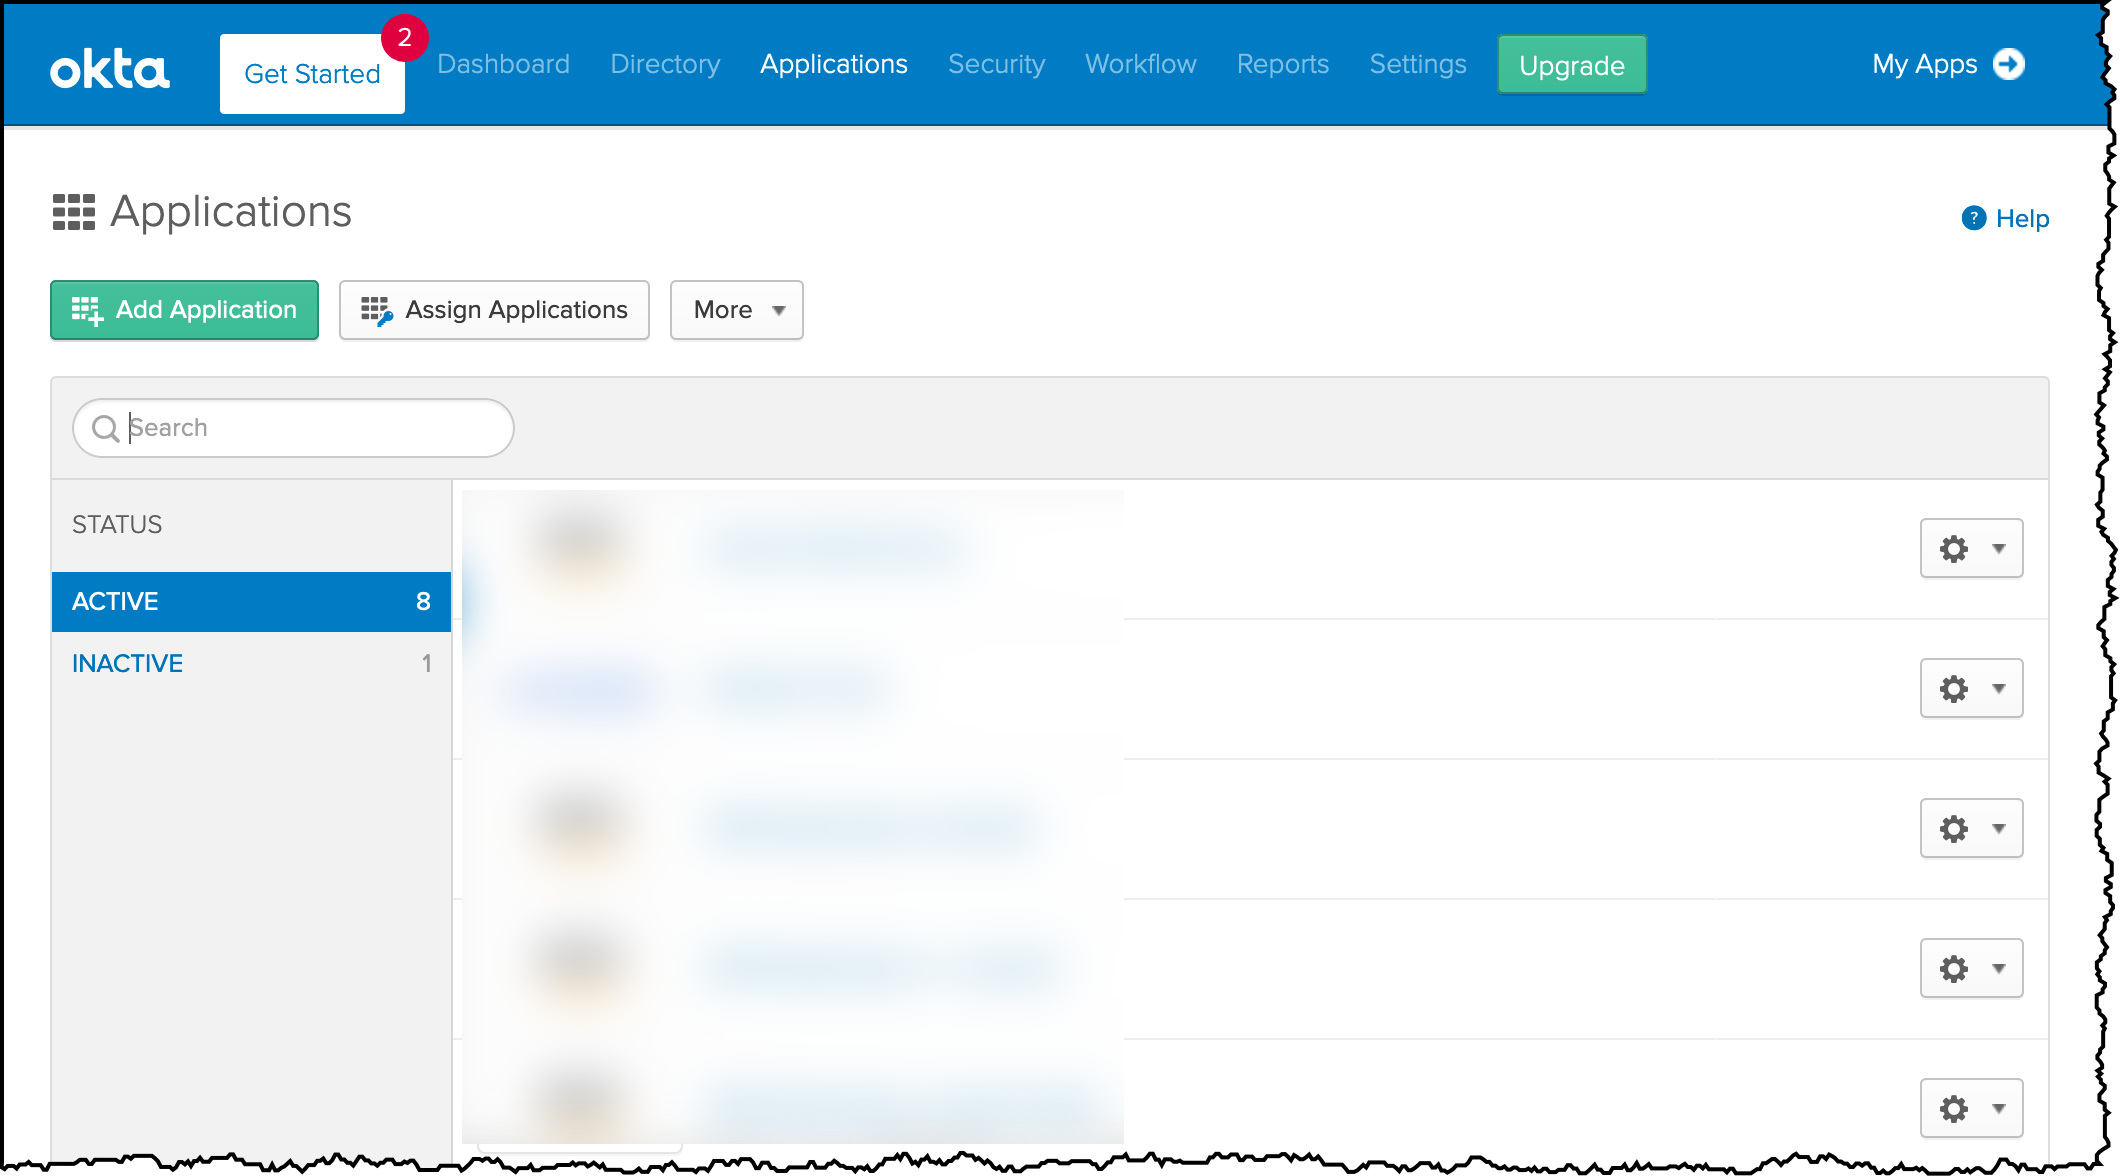 I click the green Add Application button and I search for AWS SSO application. I click Add.
 I enter a name to the app (you can choose whatever name you like) and click Done.
On the next screen, I configure the mutual agreement between AWS Single Sign-On and Okta. I first download the SAML Meta Data file generated by Okta by clicking the blue link Identity Provider Metadata. I keep this file, I need it later to configure the AWS side of the single sign-on.

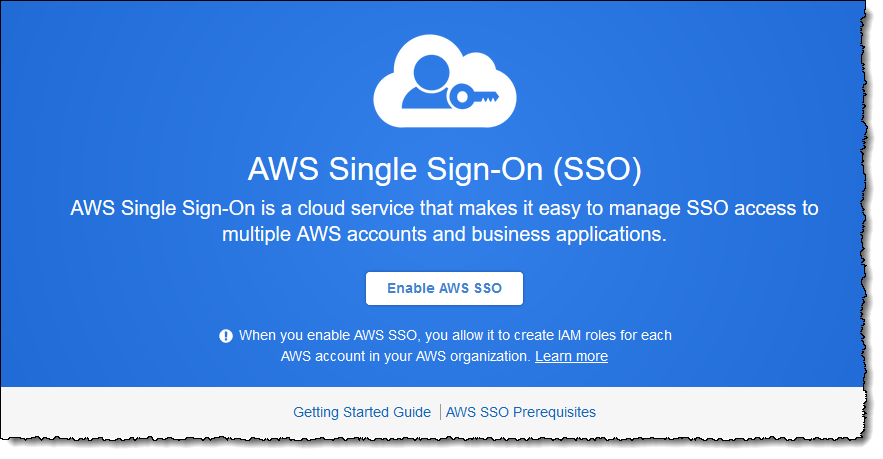
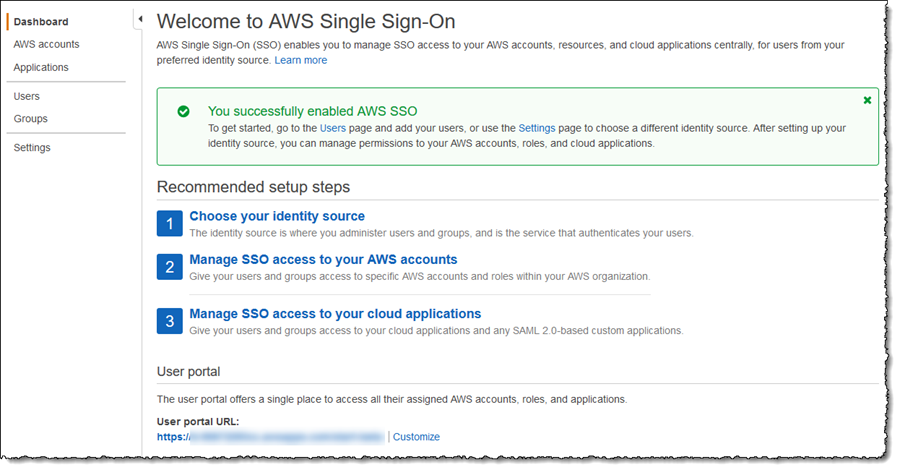
Now that I have the metadata file, I open to the AWS Management Console in a new tab. I keep the Okta tab open as the procedure is not finished there yet. I navigate to AWS Single Sign-On and click Enable AWS SSO.
I click Settings in the navigation panel. I first set the Identity source by clicking the Change link and selecting External identity provider from the list of options. Secondly, I browse to and select the XML file I downloaded from Okta in the Identity provider metadata section.

I click Next: Review, enter CONFIRM in the provided field, and finally click Change identity source to complete the AWS Single Sign-On side of the process. I take note of the two values AWS SSO ACS URL and AWS SSO Issuer URL as I must enter these in the Okta console.
 I return to the tab I left open to my Okta console, and copy the values for AWS SSO ACS URL and AWS SSO Issuer URL.
 I click Save to complete the configuration
Configuring Automatic Provisioning
Now that Okta is configured for single sign-on for my users to connect using AWS Single Sign-On I’m going to enable automatic provisioning of user accounts. As new accounts are added to Okta, and assigned to the AWS SSO application, a corresponding AWS Single Sign-On user is created automatically. As an administrator, I do not need to do any work to configure a corresponding account in AWS to map to the Okta user.
From the AWS Single Sign-On Console, I navigate to Settings and then click the Enable identity synchronization link. This opens a dialog containing the values for the SCIM endpoint and an OAuth bearer access token (hidden by default). I need both of these values to use in the Okta application settings.
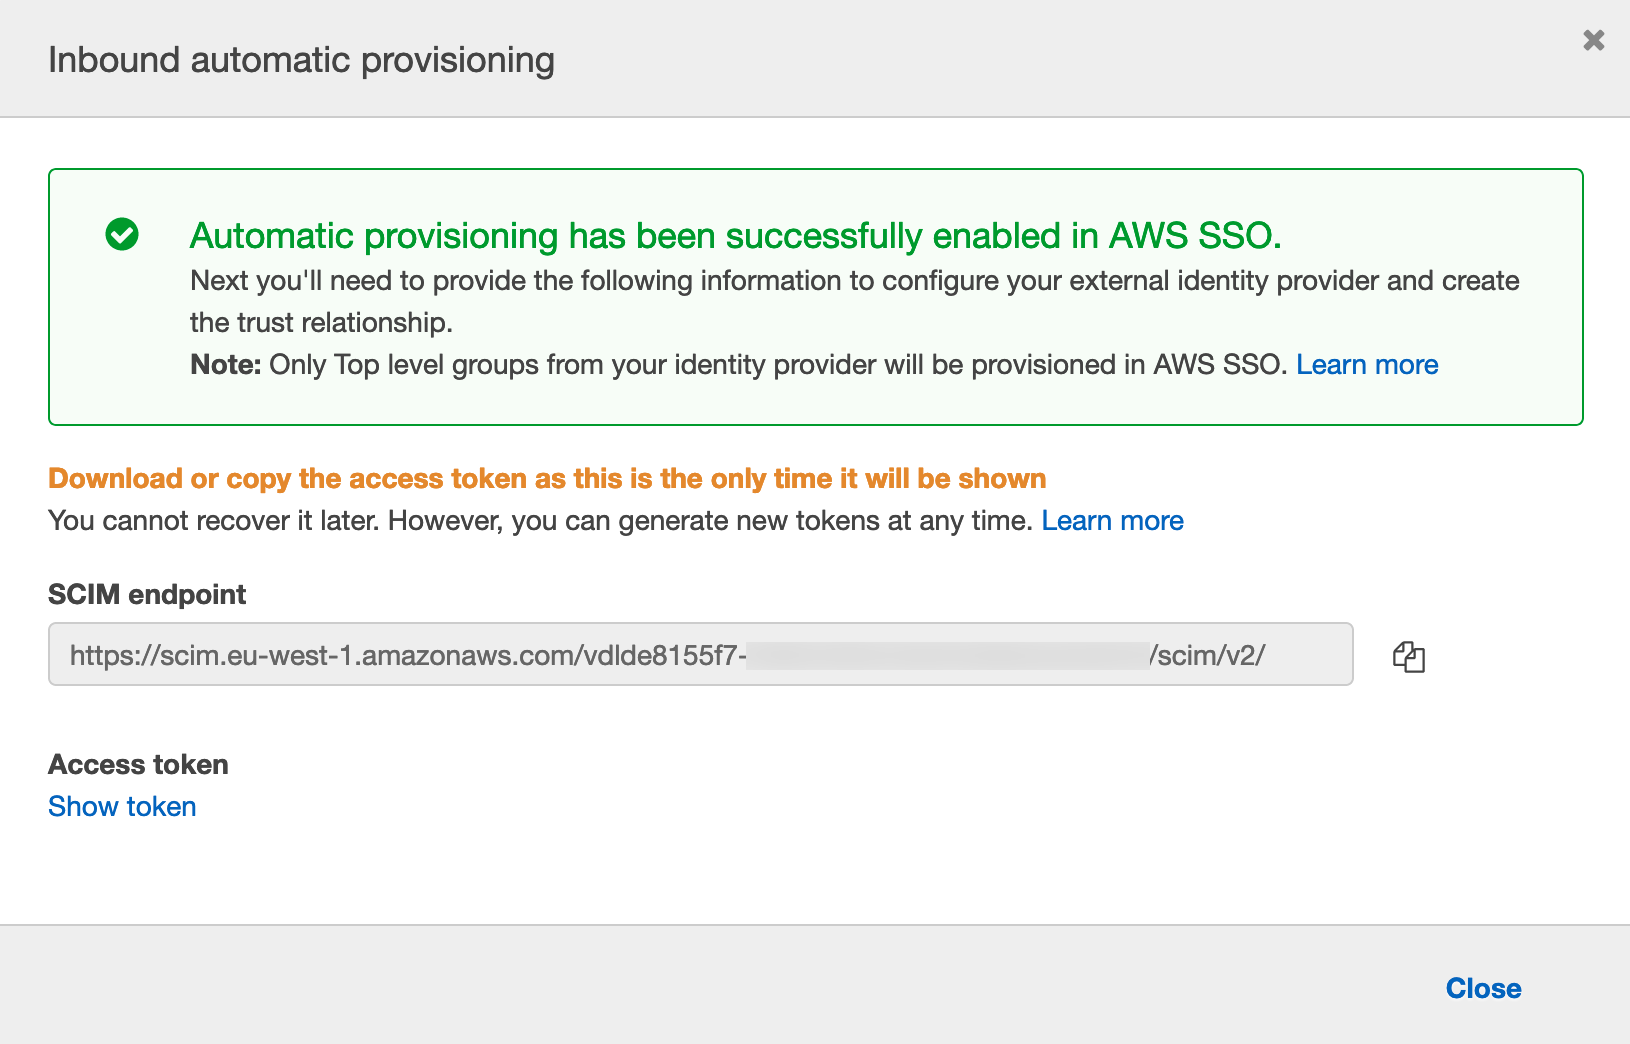 I switch back to the tab open on the Okta console, and click on Provisioning tab under the AWS SSO Application. I select Enable API Integration. Then I copy / paste the values Base URL (I paste the value copied in AWS Single Sign-On Console SCIM endpoint) and API Token (I paste the value copied AWS Single Sign-On Console Access token)
 I click Test API Credentials to verify everything works as expected. Then I click To App to enable users creation, update, and deactivate.

With provisioning enabled, my final task is to assign the users and groups that I want to synchronize from Okta to AWS Single Sign-On. I click the Assignments tab and add Okta users and groups. I click Assign, and I select the Okta users and groups I want to have access to AWS.
 These users are synchronized to AWS Single Sign-On, and the users now see the AWS Single Sign-On application appear in their Okta portal.
 To verify user synchronization is working, I switch back to the AWS Single Sign-On console and select the Users tab. The users I assigned in Okta console are present.

I Configured Single Sign-On, Now What?
Okta is now my single source of truth for my user identities and their assignment into groups, and periodic synchronization automatically creates corresponding identities in AWS Single Sign-On. My users sign into their AWS accounts and applications with their Okta credentials and experience, and don’t have to remember an additional user name or password. However, as things stand my users have only access to sign in. To manage permissions in terms of what they can access once signed into AWS, I must set up permissions in AWS Single Sign-On.
Back to AWS SSO Console, I click AWS Accounts on the left tab bar and select the account from my AWS Organizations that I am giving access to. For enterprises having multiple accounts for multiple applications or environment, it gives you the granularity to grant access to a subset of your AWS accounts.
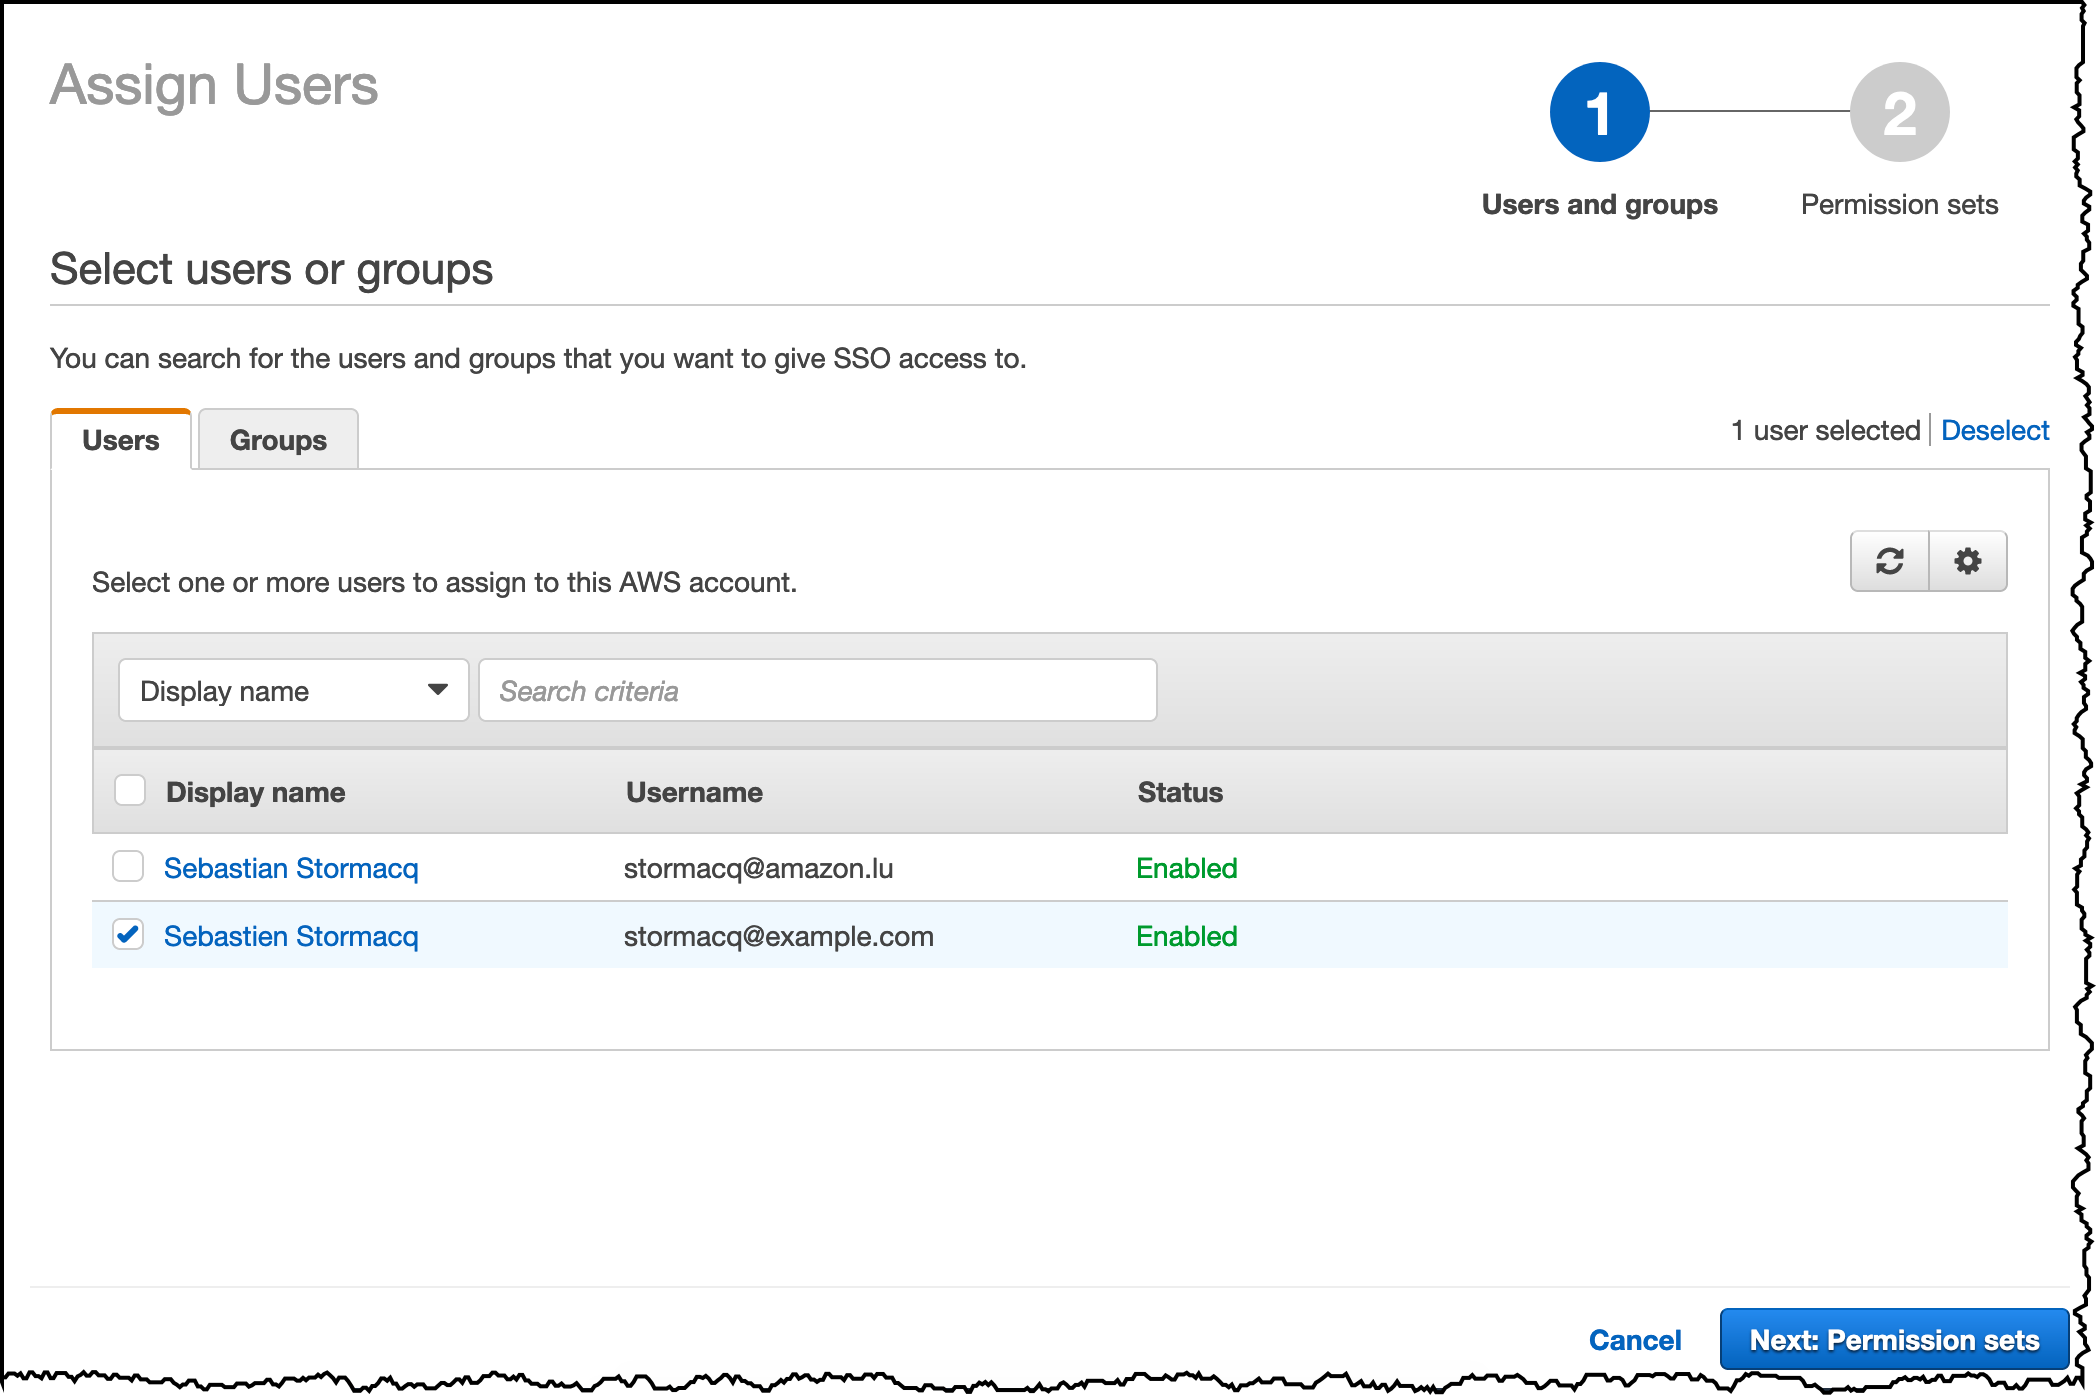
 I click Assign users to assign SSO users or groups to a set of IAM permissions. For this example, I assign just one user, the one with @example.com email address.
 I click Next: Permission sets and Create new permission set to create a set of IAM policies to describe the set of permissions I am granting to these Okta users. For this example, I am granting a read-only permission on all AWS services.
 And voila, I am ready to test this setup.
SSO User Experience for the console
Now that I showed you the steps System Administrators take to configure the integration, let me show you what is the user experience.
As an AWS Account user, I can sign-in on Okta and get access to my AWS Management Console. I can start either from the AWS Single Sign-On user portal (the URL is on the AWS Single Sign-On settings page) or from the Okta user portal page and select the AWS SSO app.
I choose to start from the AWS SSO User Portal. I am redirected to the Okta login page. I enter my Okta credentials and I land on the AWS Account and Role selection page. I click on AWS Account, select the account I want to log into, and click Management console. After a few additional redirections, I land on the AWS Console page.

SSO User Experience for the CLI
System administrators, DevOps engineers, Developers, and your automation scripts are not using the AWS console. They use the AWS Command Line Interface (CLI) instead. To configure SSO for the command line, I open a terminal and type aws configure sso. I enter the AWS SSO User Portal URL and the Region.
$aws configure sso
SSO start URL [None]: https://d-0123456789.awsapps.com/start
SSO Region [None]: eu-west-1
Attempting to automatically open the SSO authorization page in your default browser.
If the browser does not open or you wish to use a different device to authorize this request, open the following URL:

https://device.sso.eu-west-1.amazonaws.com/

Then enter the code:

AAAA-BBBB
At this stage, my default browser pops up and I enter my Okta credentials on the Okta login page. I confirm I want to enable SSO for the CLI.
 and I close the browser when I receive this message:

The CLI automatically resumes the configuration, I enter the default Region, the default output format and the name of the CLI profile I want to use.
The only AWS account available to you is: 012345678901
Using the account ID 012345678901
The only role available to you is: ViewOnlyAccess
Using the role name "ViewOnlyAccess"
CLI default client Region [eu-west-1]:
CLI default output format [None]:
CLI profile name [okta]:

To use this profile, specify the profile name using --profile, as shown:

aws s3 ls --profile okta
I am now ready to use the CLI with SSO. In my terminal, I type:
aws --profile okta s3 ls
2020-05-04 23:14:49 do-not-delete-gatedgarden-audit-012345678901
2015-09-24 16:46:30 elasticbeanstalk-eu-west-1-012345678901
2015-06-11 08:23:17 elasticbeanstalk-us-west-2-012345678901
If the machine you want to configure CLI SSO has no graphical user interface, you can configure SSO in headless mode, using the URL and the code provided by the CLI (https://device.sso.eu-west-1.amazonaws.com/ and AAAA-BBBB in the example above)
In this post, I showed how you can take advantage of the new AWS Single Sign-On capabilities to link Okta identities to AWS accounts for user single sign-on. I also make use of the automatic provisioning support to reduce complexity when managing and using identities. Administrators can now use a single source of truth for managing their users, and users no longer need to manage an additional identity and password to sign into their AWS accounts and applications.
AWS Single Sign-On with Okta is free to use, and is available in all Regions where AWS Single Sign-On is available. The full list is here.
To see all this in motion, you can check out the following demo video for more details on getting started.
-- seb Via AWS News Blog https://ift.tt/1EusYcK
No comments:
Post a Comment